/README.md
https://gitlab.com/fuzzynemesis/hackathon-starter · Markdown · 1414 lines · 1162 code · 252 blank · 0 comment · 0 complexity · 6eed7e5d8087597f028986cb269632e9 MD5 · raw file
Large files are truncated click here to view the full file
- 
- Hackathon Starter [](https://david-dm.org/sahat/hackathon-starter) [](https://travis-ci.org/sahat/hackathon-starter) [](https://github.com/igrigorik/ga-beacon)
- =======================
- [](https://gitter.im/sahat/hackathon-starter?utm_source=badge&utm_medium=badge&utm_campaign=pr-badge&utm_content=badge) [](http://start.thinkful.com/node/)
- **Live Demo**: http://hackathonstarter.herokuapp.com
- Jump to [What's new in 3.0.3?](#changelog)
- A boilerplate for **Node.js** web applications.
- If you have attended any hackathons in the past, then you know how much time it takes to
- get a project started: decide on what to build, pick a programming language, pick a web framework,
- pick a CSS framework. A while later, you might have an initial project up on GitHub and only then
- can other team members start contributing. Or how about doing something as simple as *Sign in with Facebook*
- authentication? You can spend hours on it if you are not familiar with how OAuth 2.0 works.
- When I started this project, my primary focus was on **simplicity** and **ease of use**.
- I also tried to make it as **generic** and **reusable** as possible to cover most use cases of hackathon web apps,
- without being too specific. In the worst case you can use this as a learning guide for your projects,
- if for example you are only interested in **Sign in with Google** authentication and nothing else.
- Chances are you do not need all authentication methods or API examples. As of **Hackathon Starter 2.1**
- it is possible to selectively check which authentication methods you need by running `node setup.js`.
- <h4 align="center">Modern Theme</h4>
- 
- <h4 align="center">Flatly Bootstrap Theme</h4>
- 
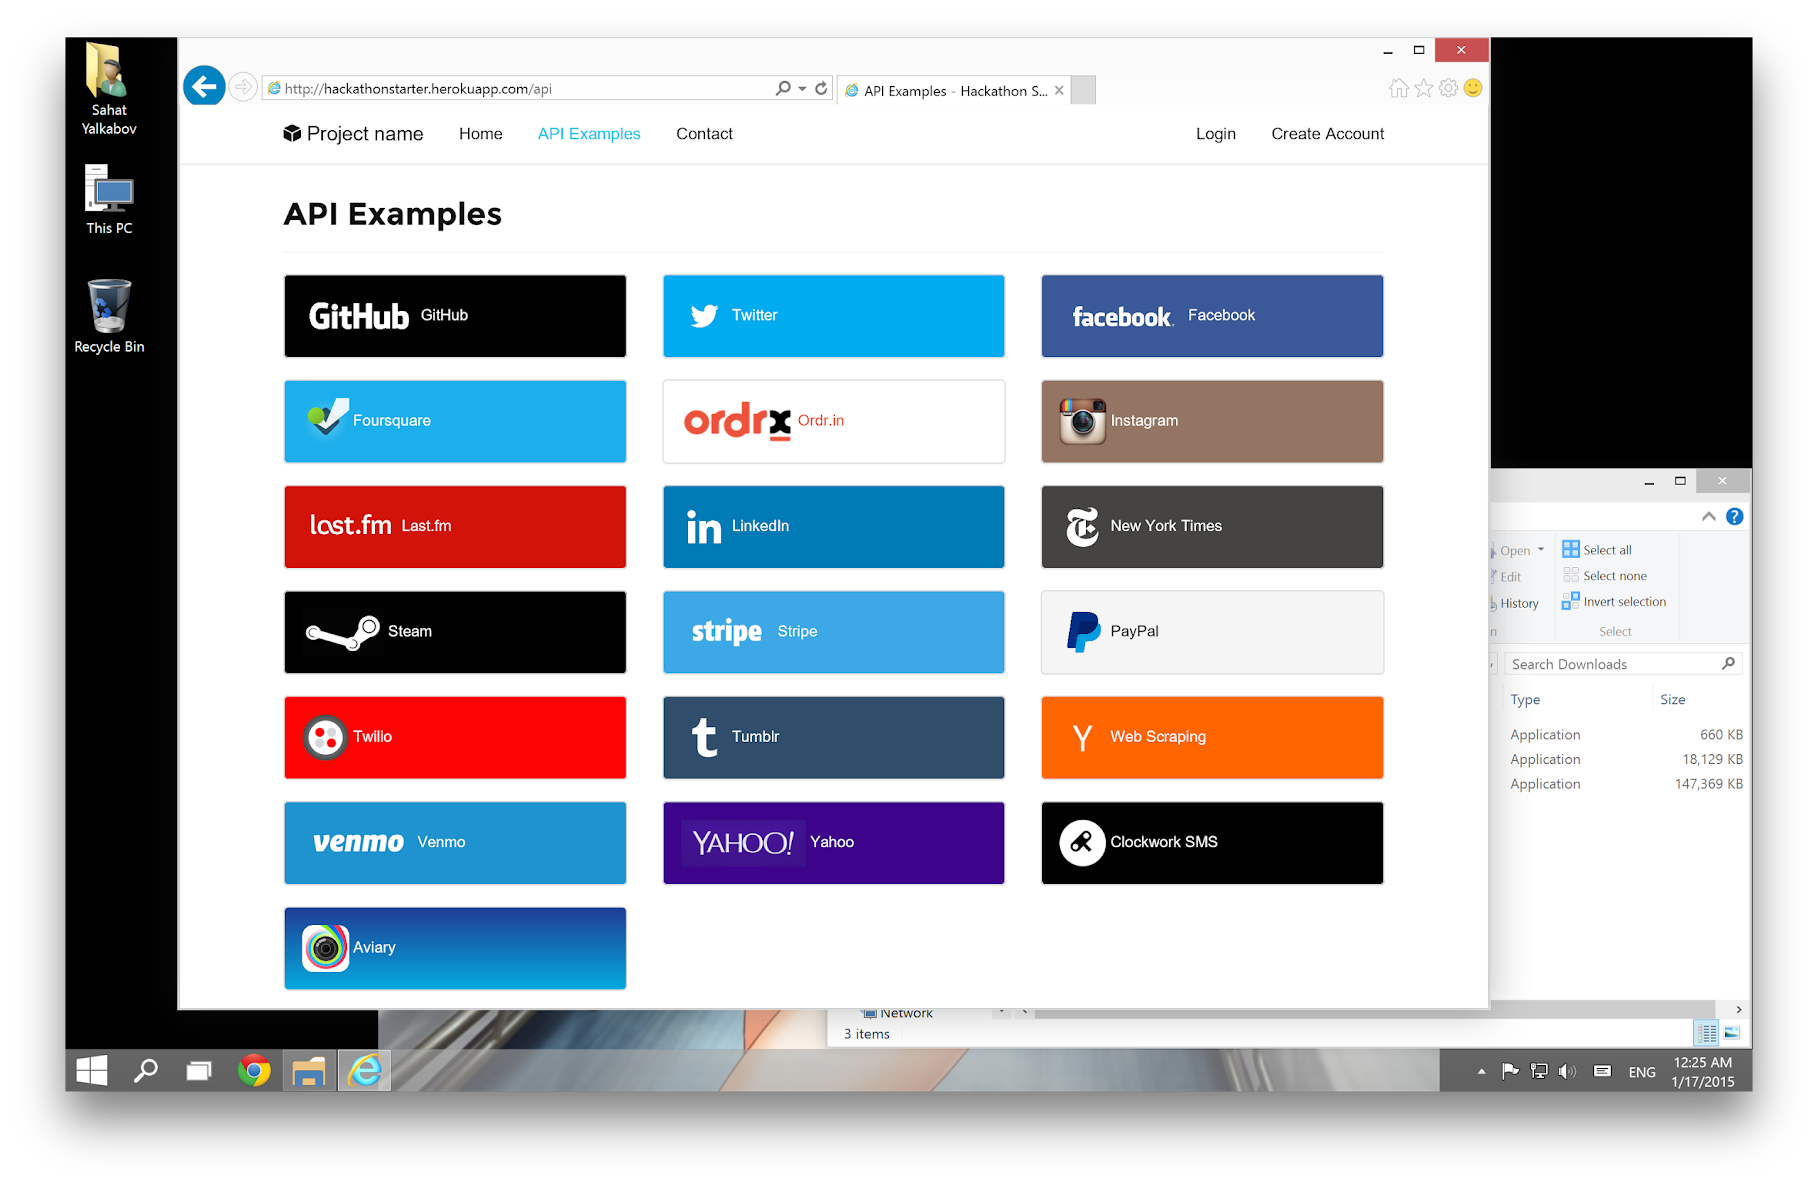
- <h4 align="center">API Examples</h4>
- 
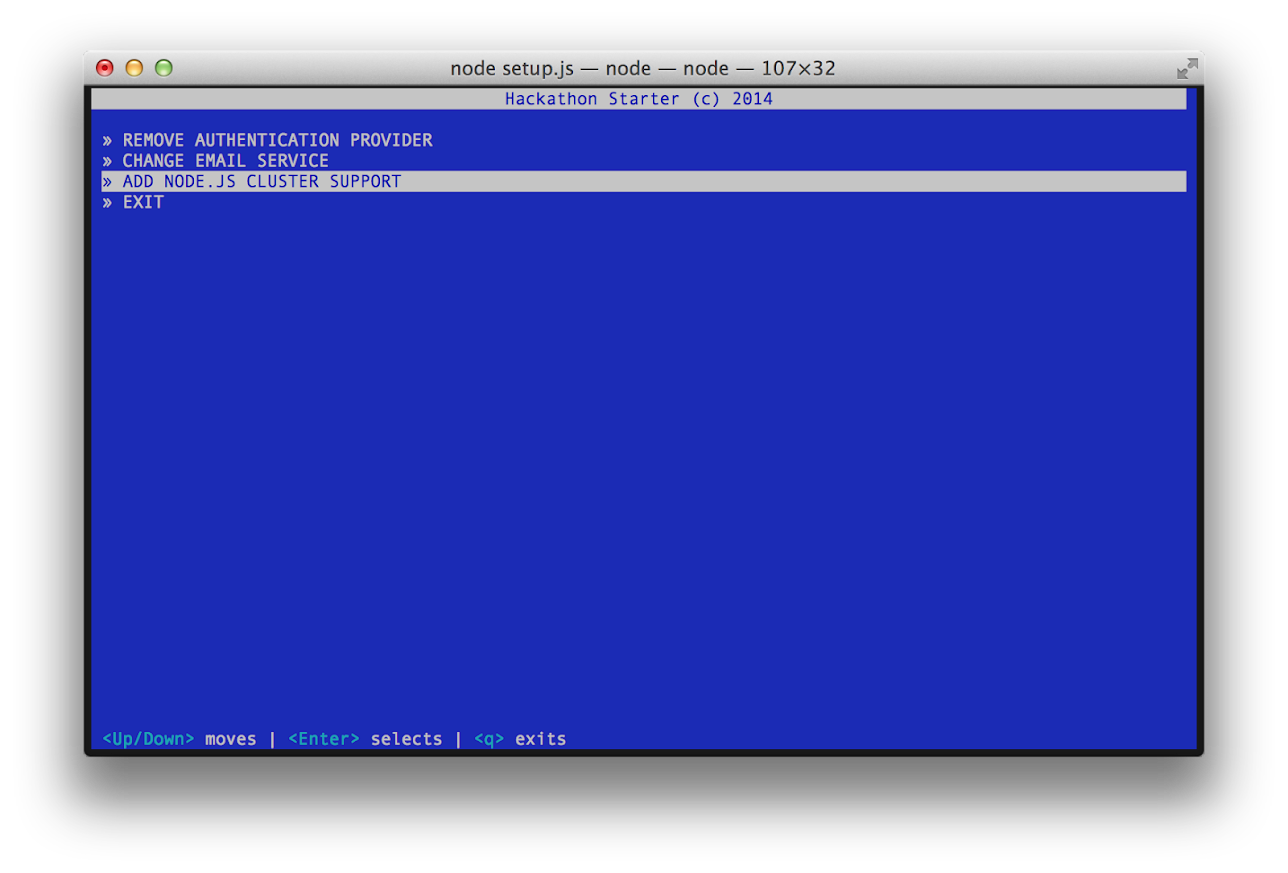
- <h4 align="center">Hackathon Starter Generator</h4>
- 
- Table of Contents
- -----------------
- - [Features](#features)
- - [Prerequisites](#prerequisites)
- - [Getting Started](#getting-started)
- - [Generator](#generator)
- - [Obtaining API Keys](#obtaining-api-keys)
- - [Project Structure](#project-structure)
- - [List of Packages](#list-of-packages)
- - [Useful Tools and Resources](#useful-tools-and-resources)
- - [Recommended Design Resources](#recommended-design-resources)
- - [Recommended Node.js Libraries](#recommended-nodejs-libraries)
- - [Recommended Client-side Libraries](#recommended-client-side-libraries)
- - [Pro Tips](#pro-tips)
- - [FAQ](#faq)
- - [How It Works](#how-it-works-mini-guides)
- - [Mongoose Cheatsheet](#mongoose-cheatsheet)
- - [Deployment](#deployment)
- - [Changelog](#changelog)
- - [Contributing](#contributing)
- - [License](#license)
- Features
- --------
- - **Local Authentication** using Email and Password
- - **OAuth 1.0a Authentication** via Twitter
- - **OAuth 2.0 Authentication** via Facebook, Google, GitHub, LinkedIn, Instagram
- - Flash notifications
- - MVC Project Structure
- - Node.js clusters support
- - Rails 3.1-style asset pipeline by connect-assets (See FAQ)
- - LESS stylesheets (auto-compiled without any Gulp/Grunt hassle)
- - Bootstrap 3 + Flat UI + iOS7
- - Contact Form (powered by Mailgun, Sendgrid or Mandrill)
- - **Account Management**
- - Gravatar
- - Profile Details
- - Change Password
- - Forgot Password
- - Reset Password
- - Link multiple OAuth strategies to one account
- - Delete Account
- - CSRF protection
- - **API Examples**: Facebook, Foursquare, Last.fm, Tumblr, Twitter, Stripe, LinkedIn and more.
- Prerequisites
- -------------
- - [MongoDB](http://www.mongodb.org/downloads)
- - [Node.js](http://nodejs.org)
- - Command Line Tools
- - <img src="http://deluge-torrent.org/images/apple-logo.gif" height="17"> **Mac OS X**: [Xcode](https://itunes.apple.com/us/app/xcode/id497799835?mt=12) (or **OS X 10.9 Mavericks**: `xcode-select --install`)
- - <img src="http://dc942d419843af05523b-ff74ae13537a01be6cfec5927837dcfe.r14.cf1.rackcdn.com/wp-content/uploads/windows-8-50x50.jpg" height="17"> **Windows**: [Visual Studio](http://www.visualstudio.com/downloads/download-visual-studio-vs#d-express-windows-8)
- - <img src="https://lh5.googleusercontent.com/-2YS1ceHWyys/AAAAAAAAAAI/AAAAAAAAAAc/0LCb_tsTvmU/s46-c-k/photo.jpg" height="17"> **Ubuntu**: `sudo apt-get install build-essential`
- - <img src="http://i1-news.softpedia-static.com/images/extra/LINUX/small/slw218news1.png" height="17"> **Fedora**: `sudo dnf groupinstall "Development Tools"`
- - <img src="https://en.opensuse.org/images/b/be/Logo-geeko_head.png" height="17"> **OpenSUSE**: `sudo zypper install --type pattern devel_basis`
- **Note:** If you are new to Node or Express, I recommend to watch
- [Node.js and Express 101](http://www.youtube.com/watch?v=BN0JlMZCtNU)
- screencast by Alex Ford that teaches Node and Express from scratch. Alternatively,
- here is another great tutorial for complete beginners - [Getting Started With Node.js, Express, MongoDB](http://cwbuecheler.com/web/tutorials/2013/node-express-mongo/).
- Getting Started
- ---------------
- The easiest way to get started is to clone the repository:
- ```bash
- # Get the latest snapshot
- $ git clone https://github.com/sahat/hackathon-starter.git myproject
- $ cd myproject
- $ git remote rm origin
- # Install NPM dependencies
- $ npm install
- $ node app.js
- ```
- **Note:** I highly recommend installing [Nodemon](https://github.com/remy/nodemon).
- It watches for any changes in your node.js app and automatically restarts the
- server. Once installed, instead of `node app.js` use `nodemon app.js`. It will
- save you a lot of time in the long run, because you won't need to manually
- restart the server each time you make a small change in code. To install, run
- `sudo npm install -g nodemon`.
- Generator
- ---------
- Hackathon Starter Generator is tighly coupled to the project code. As soon as you
- start changing and moving things around, it will probably no longer work as
- expected. That is why it's best to use when you first download the project.
- Currently it supports switching between SendGrid, Mailgun and Mandrill email
- services and adding a Node.js cluster support.
- To get started, run: `node setup.js`.
- **Note:** Generator has a "destructive" behavior, it will physically
- modify your code. *There is no undo action.* To be on a safe side, always commit
- your code to Git, so you could go back and revert the changes.
- Obtaining API Keys
- ------------------
- To use any of the included APIs or OAuth authentication methods, you will need
- to obtain appropriate credentials: Client ID, Client Secret, API Key, or
- Username & Password. You will need to go through each provider to generate new
- credentials.
- **Hackathon Starter 2.0 Update:** I have included dummy keys and passwords for
- all API examples to get you up and running even faster. But don't forget to update
- them with *your credentials* when you are ready to deploy an app.
- <img src="http://images.google.com/intl/en_ALL/images/srpr/logo6w.png" width="200">
- - Visit [Google Cloud Console](https://cloud.google.com/console/project)
- - Click on the **Create Project** button
- - Enter *Project Name*, then click on **Create** button
- - Then click on *APIs & auth* in the sidebar and select *API* tab
- - Click on **Google+ API** under *Social APIs*, then click **Enable API**
- - Next, under *APIs & auth* in the sidebar click on *Credentials* tab
- - Click on **Create new Client ID** button
- - Select *Web Application* and click on **Configure Consent Screen**
- - Fill out the required fields then click on **Save**
- - In the *Create Client ID* modal dialog:
- - **Application Type**: Web Application
- - **Authorized Javascript origins**: http://localhost:3000
- - **Authorized redirect URI**: http://localhost:3000/auth/google/callback
- - Click on **Create Client ID** button
- - Copy and paste *Client ID* and *Client secret* keys into `config/secrets.js`
- **Note:** When you ready to deploy to production don't forget to
- add your new url to *Authorized Javascript origins* and *Authorized redirect URI*,
- e.g. `http://my-awesome-app.herokuapp.com` and
- `http://my-awesome-app.herokuapp.com/auth/google/callback` respectively.
- The same goes for other providers.
- <hr>
- <img src="http://www.doit.ba/img/facebook.jpg" width="200">
- - Visit [Facebook Developers](https://developers.facebook.com/)
- - Click **Apps > Create a New App** in the navigation bar
- - Enter *Display Name*, then choose a category, then click **Create app**
- - Copy and paste *App ID* and *App Secret* keys into `config/secrets.js`
- - *App ID* is **clientID**, *App Secret* is **clientSecret**
- - Click on *Settings* on the sidebar, then click **+ Add Platform**
- - Select **Website**
- - Enter `http://localhost:3000` for *Site URL*
- **Note:** After a successful sign in with Facebook, a user will be redirected back to home page with appended hash `#_=_` in the URL. It is *not* a bug. See this [Stack Overflow](https://stackoverflow.com/questions/7131909/facebook-callback-appends-to-return-url) discussion for ways to handle it.
- <hr>
- <img src="https://github.global.ssl.fastly.net/images/modules/logos_page/GitHub-Logo.png" width="200">
- - Go to [Account Settings](https://github.com/settings/profile)
- - Select **Applications** from the sidebar
- - Then inside **Developer applications** click on **Register new application**
- - Enter *Application Name* and *Homepage URL*
- - For *Authorization Callback URL*: http://localhost:3000/auth/github/callback
- - Click **Register application**
- - Now copy and paste *Client ID* and *Client Secret* keys into `config/secrets.js`
- <hr>
- <img src="https://g.twimg.com/Twitter_logo_blue.png" width="90">
- - Sign in at [https://apps.twitter.com/](https://apps.twitter.com/)
- - Click **Create a new application**
- - Enter your application name, website and description
- - For **Callback URL**: http://127.0.0.1:3000/auth/twitter/callback
- - Go to **Settings** tab
- - Under *Application Type* select **Read and Write** access
- - Check the box **Allow this application to be used to Sign in with Twitter**
- - Click **Update this Twitter's applications settings**
- - Copy and paste *Consumer Key* and *Consumer Secret* keys into `config/secrets.js`
- <hr>
- <img src="http://www.danpontefract.com/wp-content/uploads/2014/02/logo-linkedin.png" width="200">
- - Sign in at [LinkedIn Developer Network](http://developer.linkedin.com/)
- - From the account name dropdown menu select **API Keys**
- - *It may ask you to sign in once again*
- - Click **+ Add New Application** button
- - Fill out all the *required* fields
- - **OAuth 2.0 Redirect URLs**: http://localhost:3000/auth/linkedin/callback
- - **JavaScript API Domains**: http://localhost:3000
- - For **Default Application Permissions** make sure at least the following is checked:
- - `r_basicprofile`
- - Finish by clicking **Add Application** button
- - Copy and paste *API Key* and *Secret Key* keys into `config/secrets.js`
- - *API Key* is your **clientID**
- - *Secret Key* is your **clientSecret**
- <hr>
- <img src="https://s3.amazonaws.com/venmo/venmo_logo_blue.png" width="200">
- - Visit the **Account** section of your Venmo profile after logging in
- - Click on the **Developers** tab
- - Then click on the [new](https://venmo.com/account/app/new) link next to **Your Applications (0)**
- - Fill in the required fields: *App Name* and *What Will The App Be Used For?*
- - For **Web Redirect URL** enter: http://localhost:3000/auth/venmo/callback
- - Hit **Create** button
- - Back on the **Developers** tab click on **view** link next to **Your Applications (1) new**
- - Copy and paste **ID** and **Secret** keys into `config/secrets.js`
- <hr>
- <img src="https://stripe.com/img/about/logos/logos/black@2x.png" width="200">
- - [Sign up](http://stripe.com) or log into your [dashboard](https://manage.stripe.com)
- - Click on your profile and click on Account Settings
- - Then click on [API Keys](https://manage.stripe.com/account/apikeys)
- - Copy the **Secret Key**. and add this into `config/secrets.js`
- <hr>
- <img src="https://www.paypalobjects.com/webstatic/developer/logo_paypal-developer_beta.png" width="200">
- - Visit [PayPal Developer](https://developer.paypal.com/)
- - Log in to your PayPal account
- - Click **Applications > Create App** in the navigation bar
- - Enter *Application Name*, then click **Create app**
- - Copy and paste *Client ID* and *Secret* keys into `config/secrets.js`
- - *App ID* is **client_id**, *App Secret* is **client_secret**
- - Change **host** to api.paypal.com if you want to test against production and use the live credentials
- <hr>
- <img src="https://playfoursquare.s3.amazonaws.com/press/2014/foursquare-logomark.png" width="200">
- - Go to [foursquare for Developers](https://developer.foursquare.com/)
- - Click on **My Apps** in the top menu
- - Click the **Create A New App** button
- - Enter *App Name*, *Welcome page url*,
- - For **Redirect URI**: http://localhost:3000/auth/foursquare/callback
- - Click **Save Changes**
- - Copy and paste *Client ID* and *Client Secret* keys into `config/secrets.js`
- <hr>
- <img src="http://img4.wikia.nocookie.net/__cb20130520163346/logopedia/images/8/8d/Tumblr_logo_by_x_1337_x-d5ikwpp.png" width="200">
- - Go to http://www.tumblr.com/oauth/apps
- - Once signed in, click **+Register application**
- - Fill in all the details
- - For **Default Callback URL**: http://localhost:3000/auth/tumblr/callback
- - Click **✔Register**
- - Copy and paste *OAuth consumer key* and *OAuth consumer secret* keys into `config/secrets.js`
- <hr>
- <img src="http://www.technologytell.com/gaming/files/2012/01/steam_logo.jpg" width="200">
- - Go to http://steamcommunity.com/dev/apikey
- - Sign in with your existing Steam account
- - Enter your *Domain Name*, then and click **Register**
- - Copy and paste *Key* into `config/secrets.js`
- <hr>
- <img src="http://iandouglas.com/presentations/pyconca2012/logos/sendgrid_logo.png" width="200">
- - Go to https://sendgrid.com/user/signup
- - Sign up and **confirm** your account via the *activation email*
- - Then enter your SendGrid *Username* and *Password* into `config/secrets.js`
- <hr>
- <img src="https://raw.github.com/mailgun/media/master/Mailgun_Primary.png" width="200">
- - Go to http://www.mailgun.com
- - Sign up and add your *Domain Name*
- - From the domain overview, copy and paste the default SMTP *Login* and *Password* into `config/secrets.js`
- <hr>
- <img src="http://cdn.appstorm.net/web.appstorm.net/web/files/2013/12/mandrill-logo.png" width="100">
- - Go to http://mandrill.com
- - Sign up and add your *Domain Name*
- - From the dashboard, click on *Get SMTP credentials*
- - Copy and paste the default SMTP *Login* and *Password* into `config/secrets.js`
- <hr>
- <img src="https://www.bitgo.com/img/new_bitgo/logo_footer.png" width="200">
- - Go to https://test.bitgo.com/
- - Sign up for an account.
- - Once logged into the dashboard, go to the top right selector and click 'account settings'
- - Under the developers tab, create your access token and copy and paste it into `config/secrets.js`
- Project Structure
- -----------------
- | Name | Description |
- | ---------------------------------- | ------------------------------------------------------------ |
- | **config**/passport.js | Passport Local and OAuth strategies, plus login middleware. |
- | **config**/secrets.js | Your API keys, tokens, passwords and database URL. |
- | **controllers**/api.js | Controller for /api route and all api examples. |
- | **controllers**/contact.js | Controller for contact form. |
- | **controllers**/home.js | Controller for home page (index). |
- | **controllers**/user.js | Controller for user account management. |
- | **models**/User.js | Mongoose schema and model for User. |
- | **public**/ | Static assets (fonts, css, js, img). |
- | **public**/**js**/application.js | Specify client-side JavaScript dependencies. |
- | **public**/**js**/main.js | Place your client-side JavaScript here. |
- | **public**/**css**/main.less | Main stylesheet for your app. |
- | **public/css/themes**/default.less | Some Bootstrap overrides to make it look prettier. |
- | **views/account**/ | Templates for *login, password reset, signup, profile*. |
- | **views/api**/ | Templates for API Examples. |
- | **views/partials**/flash.jade | Error, info and success flash notifications. |
- | **views/partials**/header.jade | Navbar partial template. |
- | **views/partials**/footer.jade | Footer partial template. |
- | **views**/layout.jade | Base template. |
- | **views**/home.jade | Home page template. |
- | app.js | Main application file. |
- | setup.js | Tool for removing authentication providers and other things. |
- **Note:** There is no preference how you name or structure your views.
- You could place all your templates in a top-level `views` directory without
- having a nested folder structure, if that makes things easier for you.
- Just don't forget to update `extends ../layout` and corresponding
- `res.render()` paths in controllers.
- List of Packages
- ----------------
- | Package | Description |
- | ------------------------------- | --------------------------------------------------------------------- |
- | async | Utility library that provides asynchronous control flow. |
- | bcrypt-nodejs | Library for hashing and salting user passwords. |
- | bitgo | Multi-sig Bitcoin wallet API. |
- | cheerio | Scrape web pages using jQuery-style syntax. |
- | clockwork | Clockwork SMS API library. |
- | connect-assets | Compiles LESS stylesheets, concatenates & minifies JavaScript. |
- | connect-mongo | MongoDB session store for Express. |
- | csso | Dependency for connect-assets library to minify CSS. |
- | express | Node.js web framework. |
- | body-parser | Express 4 middleware. |
- | cookie-parser | Express 4 middleware. |
- | express-session | Express 4 middleware. |
- | morgan | Express 4 middleware. |
- | multer | Express 4 middleware. |
- | compression | Express 4 middleware. |
- | errorhandler | Express 4 middleware. |
- | method-override | Express 4 middleware. |
- | serve-favicon | Express 4 middleware offering favicon serving and caching. |
- | express-flash | Provides flash messages for Express. |
- | express-validator | Easy form validation for Express. |
- | fbgraph | Facebook Graph API library. |
- | github-api | GitHub API library. |
- | jade | Template engine for Express. |
- | lastfm | Last.fm API library. |
- | instagram-node | Instagram API library. |
- | less | LESS compiler. Used implicitly by connect-assets. |
- | lob | Lob API library |
- | lusca | CSRF middleware. |
- | mongoose | MongoDB ODM. |
- | node-foursquare | Foursquare API library. |
- | node-linkedin | LinkedIn API library. |
- | nodemailer | Node.js library for sending emails. |
- | passport | Simple and elegant authentication library for node.js |
- | passport-facebook | Sign-in with Facebook plugin. |
- | passport-github | Sign-in with GitHub plugin. |
- | passport-google-oauth | Sign-in with Google plugin. |
- | passport-twitter | Sign-in with Twitter plugin. |
- | passport-instagram | Sign-in with Instagram plugin. |
- | passport-local | Sign-in with Username and Password plugin. |
- | passport-linkedin-oauth2 | Sign-in with LinkedIn plugin. |
- | passport-oauth | Allows you to set up your own OAuth 1.0a and OAuth 2.0 strategies. |
- | paypal-rest-sdk | PayPal APIs library. |
- | request | Simplified HTTP request library. |
- | stripe | Offical Stripe API library. |
- | tumblr.js | Tumblr API library. |
- | twilio | Twilio API library. |
- | twit | Twitter API library. |
- | lodash | Handy JavaScript utlities library. |
- | uglify-js | Dependency for connect-assets library to minify JS. |
- | validator | Used in conjunction with express-validator in **controllers/api.js**. |
- | mocha | Test framework. |
- | chai | BDD/TDD assertion library. |
- | supertest | HTTP assertion library. |
- | multiline | Multi-line strings for the generator. |
- | blessed | Interactive command line interface for the generator. |
- | yui | Used by the Yahoo API example. |
- Useful Tools and Resources
- --------------------------
- - [JSDB.io](http://www.jsdb.io) - The Database of JavaScript Libraries
- - [JS Recipes](http://sahatyalkabov.com/jsrecipes) - JavaScript tutorials for backend and frontend development.
- - [Jade Syntax Documentation by Example](http://naltatis.github.io/jade-syntax-docs/#attributes) - Even better than official Jade docs.
- - [HTML to Jade converter](http://html2jade.aaron-powell.com) - Extremely valuable when you need to quickly copy and paste HTML snippets from the web.
- - [JavascriptOO](http://www.javascriptoo.com/) - A directory of JavaScript libraries with examples, CDN links, statistics, and videos.
- - [Favicon Generator](http://realfavicongenerator.net/) - Generate favicons for PC, Android, iOS, Windows 8.
- Recommended Design Resources
- ----------------------------
- - [Code Guide](http://codeguide.co/) - Standards for developing flexible, durable, and sustainable HTML and CSS.
- - [Bootsnipp](http://bootsnipp.com/) - Code snippets for Bootstrap.
- - [UIBox](http://www.uibox.in) - Curated HTML, CSS, JS, UI components.
- - [Bootstrap Zero](http://bootstrapzero.com/) - Free Bootstrap templates themes.
- - [Google Bootstrap](http://todc.github.io/todc-bootstrap/) - Google-styled theme for Bootstrap.
- - [Font Awesome Icons](http://fortawesome.github.io/Font-Awesome/icons/) - It's already part of the Hackathon Starter, so use this page as a reference.
- - [Colors](http://clrs.cc) - A nicer color palette for the web.
- - [Creative Button Styles](http://tympanus.net/Development/CreativeButtons/) - awesome button styles.
- - [Creative Link Effects](http://tympanus.net/Development/CreativeLinkEffects/) - Beautiful link effects in CSS.
- - [Medium Scroll Effect](http://codepen.io/andreasstorm/pen/pyjEh) - Fade in/out header background image as you scroll.
- - [GeoPattern](https://github.com/btmills/geopattern) - SVG background pattern generator.
- - [Trianglify](https://github.com/qrohlf/trianglify) - SVG low-poly background pattern generator.
- Recommended Node.js Libraries
- -----------------------------
- - [Nodemon](https://github.com/remy/nodemon) - Automatically restart Node.js server on code changes.
- - [geoip-lite](https://github.com/bluesmoon/node-geoip) - Geolocation coordinates from IP address.
- - [Filesize.js](http://filesizejs.com/) - Pretty file sizes, e.g. `filesize(265318); // "265.32 kB"`.
- - [Numeral.js](http://numeraljs.com) - Library for formatting and manipulating numbers.
- - [Node Inspector](https://github.com/node-inspector/node-inspector) - Node.js debugger based on Chrome Developer Tools.
- - [node-taglib](https://github.com/nikhilm/node-taglib) - Library for reading the meta-data of several popular audio formats.
- - [sharp](https://github.com/lovell/sharp) - Node.js module for resizing JPEG, PNG, WebP and TIFF images.
- Recommended Client-side Libraries
- ---------------------------------
- - [Framework7](http://www.idangero.us/framework7) - Full Featured HTML Framework For Building iOS7 Apps.
- - [InstantClick](http://instantclick.io) - Makes your pages load instantly by pre-loading them on mouse hover.
- - [NProgress.js](https://github.com/rstacruz/nprogress) - Slim progress bars like on YouTube and Medium.
- - [Hover](https://github.com/IanLunn/Hover) - Awesome CSS3 animations on mouse hover.
- - [Magnific Popup](http://dimsemenov.com/plugins/magnific-popup/) - Responsive jQuery Lightbox Plugin.
- - [jQuery Raty](http://wbotelhos.com/raty/) - Star Rating Plugin.
- - [Headroom.js](http://wicky.nillia.ms/headroom.js/) - Hide your header until you need it.
- - [X-editable](http://vitalets.github.io/x-editable/) - Edit form elements inline.
- - [Offline.js](http://github.hubspot.com/offline/docs/welcome/) - Detect when user's internet connection goes offline.
- - [Alertify.js](http://fabien-d.github.io/alertify.js/) - Sweet looking alerts and browser dialogs.
- - [selectize.js](http://brianreavis.github.io/selectize.js/) - Styleable select elements and input tags.
- - [drop.js](http://github.hubspot.com/drop/docs/welcome/) - Powerful Javascript and CSS library for creating dropdowns and other floating displays.
- - [scrollReveal.js](https://github.com/julianlloyd/scrollReveal.js) - Declarative on-scroll reveal animations.
- Pro Tips
- --------
- - When installing an NPM package, add a *--save* flag, and it will be automatically
- added to `package.json` as well. For example, `npm install --save moment`.
- - Use [async.parallel()](https://github.com/caolan/async#parallel) when you need to run multiple
- asynchronous tasks, and then render a page, but only when all tasks are completed. For example, you might
- want to scrape 3 different websites for some data and render the results in a template
- after all 3 websites have been scraped.
- - Need to find a specific object inside an Array? Use [_.find](http://lodash.com/docs#find)
- function from Lodash. For example, this is how you would retrieve a
- Twitter token from database: `var token = _.find(req.user.tokens, { kind: 'twitter' });`,
- where 1st parameter is an array, and a 2nd parameter is an object to search for.
- FAQ
- ---
- ### Why do I get `403 Error: Forbidden` when submitting a form?
- You need to add the following hidden input element to your form. This has been
- added in the [pull request #40](https://github.com/sahat/hackathon-starter/pull/40)
- as part of the CSRF protection.
- ```
- input(type='hidden', name='_csrf', value=_csrf)
- ```
- **Note:** It is now possible to whitelist certain URLs. In other words you can
- specify a list of routes that should bypass CSRF verification check.
- **Note 2:** To whitelist dynamic URLs use regular expression tests inside the
- CSRF middleware to see if `req.originalUrl` matches your desired pattern.
- ### What is cluster_app.js?
- **Note**: It is now part of the generator as of **v2.1**.
- From the [Node.js Documentation](http://nodejs.org/api/cluster.html#cluster_how_it_works):
- > A single instance of Node runs in a single thread. To take advantage of multi-core systems
- > the user will sometimes want to launch a cluster of Node processes to handle the load.
- > The cluster module allows you to easily create child processes that all share server ports.
- Running `cluster_app.js` allows you to take advantage of this feature by forking
- a process of `app.js` for each detected CPU. For the majority of applications
- serving HTTP requests, this is a nice benefit. However, the cluster module is
- still in experimental stage, therefore it should only be used after understanding
- its purpose and behavior. To use it, simply run `node cluster_app.js`.
- **Its use is entirely optional and `app.js` is not tied in any way to it**.
- As a reminder, if you plan to use `cluster_app.js` instead of `app.js`,
- be sure to indicate that in `package.json` when you are ready to deploy your app.
- ### What is this Rails 3.1-style asset pipeline that you mentioned under Features?
- This is how you typically define static files inside HTML, Jade or any template
- for that matter:
- ```jade
- link(href='/css/styles.css', rel='stylesheet')
- script(src='/js/lib/jquery-2.1.0.min.js')
- script(src='/js/lib/bootstrap.min.js')
- script(src='/js/main.js')
- ```
- Simple enough right? But wouldn't it be nice to have it just like that in
- development mode, but when you deploy your app to production, have it minified
- and concatenated into a single file automatically without any extra effort on
- your part?
- ```jade
- link(href='/css/styles.css', rel='stylesheet')
- script(src='/js/application.js')
- ```
- As soon as you start bringing in more JavaScript libraries, the benefits of
- concatenating and minifying JavaScript files will be even greater. Using
- **connect-assets** library, it is as as simple as declaring these two lines:
- ```
- != css('styles') // expects public/css/styles.less
- != js('application') // expects public/js/application.js
- ```
- **Tip:** We can use `css` and `js` functions in Jade templates because in
- **connect-assets** middleware options we have added this line: `helperContext: app.locals`.
- The only thing you need to remember is to define your JavaScript files inside
- `public/js/application.js` using this strange syntax notation (Sprockets-style)
- borrowed from Rails. I know it's an extra thing to learn for someone who has
- never seen Rails asset pipeline before, but in this case, I think benefits
- outweigh the cost.
- ```js
- //= require lib/jquery-2.1.0.min
- //= require lib/bootstrap.min
- //= require main
- ```
- Using this approach, when working in development mode, **connect-assets** will
- load each file individually, without minifying or concatenating anything.
- When you deploy your app, it will run in production mode, and so **connect-assets**
- will automatically serve a single concatenated & minified `application.js`.
- For more information see [Sprockets-style concatenation](https://github.com/adunkman/connect-assets/#sprockets-style-concatenation)
- section.
- ### I am getting MongoDB Connection Error, how do I fix it?
- That's a custom error message defined in `app.js` to indicate that there was a
- problem connecting to MongoDB:
- ```js
- mongoose.connection.on('error', function() {
- console.error('✗ MongoDB Connection Error. Please make sure MongoDB is running.');
- });
- ```
- You need to have a MongoDB server running before launching `app.js`. You can
- download MongoDB [here](mongodb.org/downloads), or install it via a package manager.
- <img src="http://dc942d419843af05523b-ff74ae13537a01be6cfec5927837dcfe.r14.cf1.rackcdn.com/wp-content/uploads/windows-8-50x50.jpg" height="17">
- Windows users, read [Install MongoDB on Windows](http://docs.mongodb.org/manual/tutorial/install-mongodb-on-windows/).
- **Tip:** If you are always connected to the internet, you could just use
- [MongoLab](https://mongolab.com/) or [Compose](https://www.compose.io/) instead
- of downloading and installing MongoDB locally. You will only need to update the
- `db` property in `config/secrets.js`.
- ### I get an error when I deploy my app, why?
- Chances are you haven't changed the *Database URI* in `secrets.js`. If `db` is
- set to `localhost`, it will only work on your machine as long as MongoDB is
- running. When you deploy to Heroku, OpenShift or some other provider, you will not have MongoDB
- running on `localhost`. You need to create an account with [MongoLab](http://mongolab.com)
- or [Compose](https://www.compose.io/), then create a free tier database.
- See [Deployment](#deployment) for more information on how to setup an account
- and a new database step-by-step with MongoLab.
- ### Why Jade instead of Handlebars?
- When I first started this project I didn't have any experience with Handlebars. Since then I have worked on Ember.js apps and got myself familiar with the Handlebars syntax. While it is true Handlebars is easier, because it looks like good old HTML, I have no regrets picking Jade over Handlebars. First off, it's the default template engine in Express, so someone who has built Express apps in the past already knows it. Secondly, I find `extends` and `block` to be indispensable, which as far as I know, Handlebars does not have out of the box. And lastly, subjectively speaking, Jade looks much cleaner and shorter than Handlebars, or any non-HAML style for that matter.
- ### Why do you have all routes defined in app.js?
- For the sake of simplicity. While there might be a better approach,
- such as passing `app` context to each controller as outlined in this
- [blog](http://timstermatic.github.io/blog/2013/08/17/a-simple-mvc-framework-with-node-and-express/),
- I find such style to be confusing for beginners.
- It took me a long time to grasp the concept of `exports` and `module.exports`,
- let alone having a global `app` reference in other files.
- That to me is a backward thinking.
- The `app.js` is the "heart of the app", it should be the one referencing
- models, routes, controllers, etc.
- When working solo on small projects I actually prefer to have everything inside `app.js` as is the case with [this]((https://github.com/sahat/ember-sass-express-starter/blob/master/app.js))
- REST API server.
- ### I don't need a sticky footer, can I delete it?
- Absolutely. But unlike a regular footer there is a bit more work involved.
- First, delete `#wrap` and `#footer` ID selectors and `html, body { height: 100%; }`
- from **styles.less**. Next, delete `#wrap` and `#footer` lines from **layout.jade**
- (By the way, if no element is specified before class or id, Jade assumes it is
- a `div` element). Don't forget to indent everything under `#wrap` to the left
- once, since this project uses two spaces per block indentation.
- ### Why is there no Mozilla Persona as a sign-in option?
- If you would like to use **Persona** authentication strategy, use the
- [pull request #64](https://github.com/sahat/hackathon-starter/pull/64) as a
- reference guide. I have explained my reasons why it could not be merged in
- [issue #63](https://github.com/sahat/hackathon-starter/issues/63#issuecomment-34898290).
- ### How do I switch SendGrid for another email delivery service?
- Run `node setup.js` bundled with Hackathon Starter, then select
- **Email Service** option. It will automatically replace appropriate strings in
- your code. Currently there are three options: SendGrid, Mandrill, and Mailgun.
- ### Can I use Sass instead of LESS stylesheets?
- Yes you can! Although you will have to manually convert all existing stylesheets
- to Sass, which shouldn't be too hard considering how similar Sass and LESS are.
- Simply rename `styles.less` to `styles.scss` and **connect-assets** will
- automatically use Sass preprocessor.
- Your are not limited to just Sass *or* LESS, you could use both if you want to.
- In **layout.jade** simply specify LESS and Sass stylesheets separately:
- ```jade
- != css('styles') # public/css/styles.less
- != css('my_sass_styles') # public/css/my_sass_styles.scss
- ```
- And as I already mentioned you do not need to specify the file extension,
- **connect-assets** will automatically figure out which CSS preprocessor to use
- based on the filetype.
- **Note:** I did not include `node-sass` module in *package.json*, so you will
- have to install it yourself by running `npm install --save node-sass`.
- How It Works (mini guides)
- --------------------------
- This section is intended for giving you a detailed explanation about
- how a particular functionality works. Maybe you are just curious about
- how it works, or maybe you are lost and confused while reading the code,
- I hope it provides some guidance to you.
- ###Custom HTML and CSS Design 101
- [HTML5 UP](http://html5up.net/) has many beautiful templates that you can download for free.
- When you download the ZIP file, it will come with *index.html*, *images*, *css* and *js* folders. So, how do you
- integrate it with Hackathon Starter? Hackathon Starter uses Bootstrap CSS framework, but these templates do not.
- Trying to use both CSS files at the same time will likely result in undesired effects.
- **Note:** Using the custom templates approach, you should understand that you cannot reuse any of the views I have created: layout, home page, api browser, login, signup, account management, contact. Those views were built using Bootstrap grid and styles. You will have to manually update the grid using a different syntax provided in the template. **Having said that, you can mix and match if you want to do so: Use Bootstrap for main app interface, and a custom template for a landing page.**
- Let's start from the beginning. For this example I will use [Escape Velocity](http://html5up.net/escape-velocity/) template:
- 
- **Note:** For the sake of simplicity I will only consider `index.html`, and skip `left-sidebar.html`,
- `no-sidebar.html`, `right-sidebar.html`.
- Move all javascript files from `html5up-escape-velocity/js` to `public/js`. Then move all css files from `html5up-escape-velocity/css` to `public/css`. And finally, move all images from `html5up-escape-velocity/images` to `public/images` (You could move it to the existing **img** folder, but then you would have to manually change every `img` reference). Grab the contents of `index.html` and paste it into [HTML To Jade](http://html2jade.aaron-powell.com/).
- Create a new file `escape-velocity.jade` and paste the Jade markup in `views` folder.
- Whenever you see the code `res.render('account/login')` - that means it will search for `views/account/login.jade` file.
- Let's see how it looks. Create a new controller **escapeVelocity** inside `controllers/home.js`:
- ```js
- exports.escapeVelocity = function(req, res) {
- res.render('escape-velocity', {
- title: 'Landing Page'
- });
- };
- ```
- And then create a route in `app.js`. I placed it right after the index controller:
- ```js
- app.get('/escape-velocity', homeController.escapeVelocity);
- ```
- Restart the server (if you are not using **nodemon**), then you should see the new template at [http://localhost:3000/escape-velocity](http://localhost:3000/escape-velocity).
- I will stop right here, but if you would like to use this template as more than just a single page, take a look at how these Jade templates work: `layout.jade` - base template, `index.jade` - home page, `partials/header.jade` - Bootstrap navbar, `partials/footer.jade` - sticky footer. You will have to manually break it apart into smaller pieces. Figure out which part of the template you want to keep the same on all pages - that's your new `layout.jade`.
- Then, each page that changes, be it `index.jade`, `about.jade`, `contact.jade`
- will be embedded in your new `layout.jade` via `block content`. Use existing templates as a reference.
- This is a rather lengthy process, and templates you get from elsewhere,
- might have yet another grid system. That's why I chose *Bootstrap* for the Hackathon Starter.
- Many people are already familiar with *Bootstrap*, plus it's easy to get started with it if you have never used *Bootstrap*.
- You can also buy many beautifully designed *Bootstrap* themes at [Themeforest](http://themeforest.net/), and use them as a drop-in replacement for Hackathon Starter. However, if you would like to go with a completely custom HTML/CSS design, this should help you to get started!
- <hr>
- ### How do flash messages work in this project?
- Flash messages allow you to display a message at the end of the request and access
- it on next request and only next request. For instance, on a failed login attempt, you would
- display an alert with some error message, but as soon as you refresh that page or visit a different
- page and come back to the login page, that error message will be gone. It is only displayed once.
- This project uses *express-flash* module for flash messages. And that
- module is built on top of *connect-flash*, which is what I used in
- this project initially. With *express-flash* you don't have to
- explicity send a flash message to every view inside `res.render()`.
- All flash messages are available in your views via `messages` object by default,
- thanks to *express-flash*.
- Flash messages have a two-step process. You use `req.flash('errors', { msg: 'Error messages goes here' }`
- to create a flash message in your controllers, and then display them in your views:
- ```jade
- if messages.errors
- .alert.alert-danger.fade.in
- for error in messages.errors
- div= error.msg
- ```
- In the first step, `'errors'` is the name of a flash message, which should match the
- name of the property on `messages` object in your views. You place alert messages
- inside `if message.errors` because you don't want to show them flash messages are actually present.
- The reason why you pass an error like `{ msg: 'Error messages goes here' }` instead
- of just a string - `'Error messages goes here'`, is for the sake of consistency.
- To clarify that, *express-validator* module which is used for validating and sanitizing user's input,
- returns all errors as an array of objects, where each object has a `msg` property with a message
- why an error has occurred. Here is a more general example of what express-validator returns when there are errors present:
- ```js
- [
- { param: "name", msg: "Name is required", value: "<received input>" },
- { param: "email", msg: "A valid email is required", value: "<received input>" }
- ]
- ```
- To keep consistent with that style, you should pass all flash messages
- as `{ msg: 'My flash message' }` instead of a string. Otherwise you will just see an alert box
- without an error message. That is because, in **partials/flash.jade** template it will try to output
- `error.msg` (i.e. `"My flash message".msg`), in other words it will try to call a `msg` method on a *String* object,
- which will return *undefined*. Everything I just mentioned about errors, also applies
- to "info" and "success" flash messages, and you could even create a new one yourself, such as:
- **Data Usage Controller (Example)**
- ```
- req.flash('warning', { msg: 'You have exceeded 90% of your data usage' });
- ```
- **User Account Page (Example)**
- ```jade
- if messages.warning
- .alert.alert-warning.fade.in
- for warning in messages.warning
- div= warning.msg
- ```
- `partials/flash.jade` is a partial template that contains how flash messages
- are formatted. Previously, flash
- messages were scattered throughout each view that used flash messages
- (contact, login, signup, profile), but now, thankfully it is uses a *DRY* approach.
- The flash messages partial template is *included* in the `layout.jade`, along with footer and navigation.
- ```jade
- body
- #wrap
- include partials/navigation
- .container
- include partials/flash
- block content
- include partials/footer
- ```
- If you have any further questions about flash messages,
- please feel free to open an issue and I will update this mini-guide accordingly,
- or send a pull request if you would like to include something that I missed.
- <hr>
- ### How do I create a new page?
- A more correct way to be to say "How do I create a new route". The main file `app.js` contains all the routes.
- Each route has a callback function associated with it. Sometimes you will see 3 or more arguments
- to routes. In cases like that, the first argument is still a URL string, while middle arguments
- are what's called middleware. Think of middleware as a door. If this door prevents you from
- continuing forward, you won't get to your callback function. One such example is a route that requires authentication.
- ```js
- app.get('/account', passportConf.isAuthenticated, userController.getAccount);
- ```
- It always goes from left to right. A user visits `/account` page. Then `isAuthenticated` middleware
- checks if you are authenticated:
- ```js
- exports.isAuthenticated = function(req, res, next) {
- if (req.isAuthenticated()) {
- return next();
- }
- res.redirect('/login');
- };
- ```
- If you are authenticated, you let this visitor pass through your "door" by calling `return next();`. It then proceeds to the
- next middleware until it reaches the last argument, which is a callback function that typically renders a template on `GET` requests or redirects on `POST` requests. In this case, if you are authenticated, you will be redirected to *Account Management* page, otherwise you will be redirected to *Login* page.
- ```js
- exports.getAccount = function(req, res) {
- res.render('account/profile', {
- title: 'Account Management'
- });
- };
- ```
- Express.js has `app.get`, `app.post`, `app.put`, `app.delete`, but for the most part you will only use the first two HTTP verbs, unless you are building a RESTful API.
- If you just want to display a page, then use `GET`, if you are submitting a form, sending a file then use `POST`.
- Here is a typical workflow for adding new routes to your application. Let's say we are building
- a page that lists all books from database.
- **Step 1.** Start by defining a route.
- ```js
- app.get('/books', bookController.getBooks);
- ```
- ---
- **Note:** As of Express 4.x you can define you routes like so:
- ```js
- app.route('/books')
- .get(bookController.getBooks)
- .post(bookController.createBooks)
- .put(bookController.updateBooks)
- .delete(bookController.deleteBooks)
- ```
- And here is how a route would look if it required an *authentication* and an *authorization* middleware:
- ```js
- app.route('/api/twitter')
- .all(passportConf.isAuthenticated)
- .all(passportConf.isAuthorized)
- .get(apiController.getTwitter);
- .post(apiController.postTwitter)
- ```
- Use whichever style that makes sense to you. Either one is acceptable. I really think that chaining HTTP verbs on
- `app.route` is very clean and elegant approach, but on the other hand I can no longer see all my routes at a glance
- when you have one route per line.
- **Step 2.** Create a new schema and a model `Book.js` inside the *models* directory.
- ```js
- var bookSchema = new mongoose.Schema({
- name: String
- });
- var Book = mongoose.model('Book', bookSchema);
- module.exports = Book;
- ```
- **Step 3.** Create a new controller file called `book.js` inside the *controllers* directory.
- ```js
- /**
- * GET /books
- * List all books.
- */
- var Book = require('../models/Book.js');
- exports.getBooks = function(req, res) {
- Book.find(function(err, docs) {
- res.render('books', { books: docs });
- });
- };
- ```
- **Step 4.** Import that controller in `app.js`.
- ```js
- var bookController = require('./controllers/book');
- ```
- **Step 5.** Create `books.jade` template.
- ```jade
- extends layout
- block content
- .page…